In today’s fast-paced world, where parenthood comes with its unique challenges and joys, having the right tools and equipment can make all the difference. Baby Trend, a trusted and widely recognized brand in the world of baby products, offers a range of strollers designed to meet the needs of parents and caregivers alike. Among their offerings, Baby Trend strollers stand out for their reliability, affordability, and versatility.

mentioned above is just one out of many, as there are lots of different ones in the range. The prices, however, will vary.
For example, some are in the hundred-dollar range, while some are much cheaper. It all depends on your budget and what you are looking for.
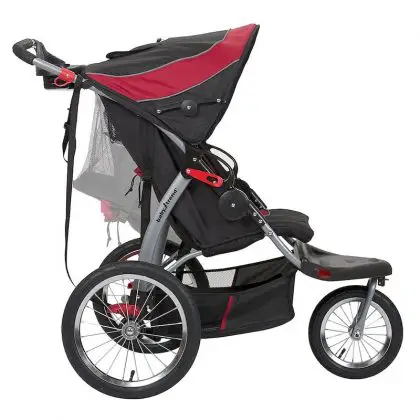
So far we have discussed the designs and benefits of the baby trend strollers; now it’s time to have a quick look at the features of the Baby Trend Stride Sport Stroller.
Large shade canopy with a cool peek-a-boo window.
Proper installation of a baby stroller is necessary because if you are using improperly adjusted or poorly installed stroller parts, then this will be most likely to cause wobbly, vibrant wheels and other individual parts, like parent trays or cup holders, etc., that can detach from the stroller while you are jogging.
This, in turn, can cause more harm than good by serious injuries.
Baby trend Stride Sport stroller manual.
If you look at the Stride Sport Stroller manual, you’ll find a lot of details that can sometimes appear ambiguous to most parents.
We are going to make things simple and easy for you. Follow the instructions for the better assembly of your sports stroller.
Now you have all the parts in front of you, the next question is how to assemble them. For a simple installation guide, follow the following steps;
1. Unfold the stroller frame and pull it fully until and unless it clicks into place.
2. Let the frame rest on the back handle.
3. Lock the forks by using the locking mechanism before installing the front wheels.
4. Loosen the locking bolt by rotating the lever enough to slide the front wheel in the middle of the forks.
5. Tighten the lever by rotating it clockwise. When the wheel is tight enough, you can flip the lever handle up towards the forks.
6. Make sure that the retainer plate is leading toward the forks and is inserted into the slot present on the forks. On the retainer plate, the tab must be lined up with the slot of the forks.
7. Install the rear wheels by laying the stroller on one side. Insert the axle of the wheel into the frame. It will easily lock into the place.
8. Now turn the baby trend sport stroller over and again and insert the axle of the rear wheel into the frame.
9. For safety, you have to check if the wheels are securely attached or not!
10. It’s time to install the parent tray; to do this, you have to snap the parent tray onto the buttons located on the handlebar.
11. Finally, install the child’s tray by simply snapping it in the hole on the sports stroller’s armrest. Then, rotate it and do the same with the other side of the sports stroller.
12. If you want to open the canopy then pull forward the front edge of the canopy and keep holding the rear edge of the canopy into its place.
13. To unfold the baby trend stroller, push the button on the handlebar. It will be folded with one hand only.
Your sports stroller is fully assembled now; put your child into the seat, buckle up the harness straps, and enjoy jogging with your kid!

What comes with this stroller?
What comes with this stroller?
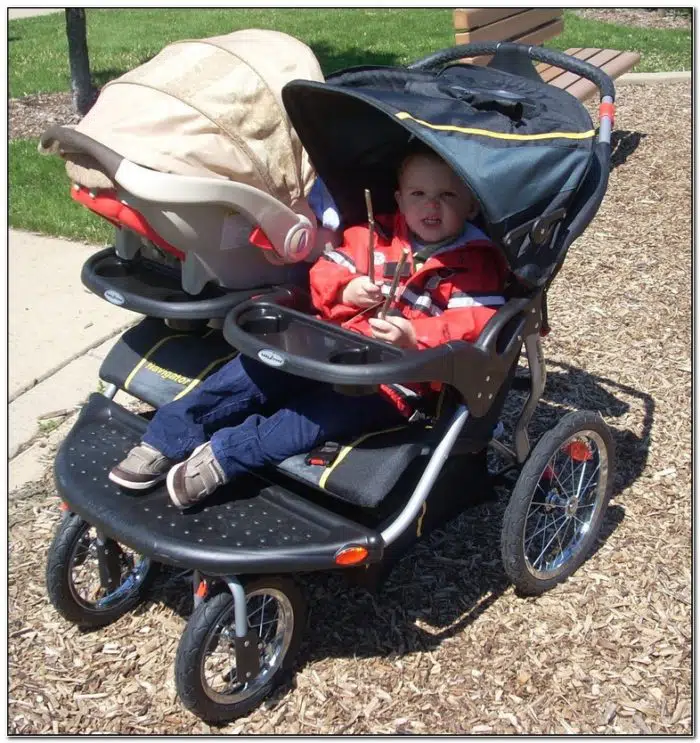
The main body of the double stroller.
2 front wheels.
2 rear wheels with the axle.
Two children’s trays.
A parent tray.
Cup holders.
Canopies.
1. Release the lever of the stroller frame. You will hear a popping sound when it gets secured into its place.
2. Let the stroller rest on its back. Handlebars face the floor while the front wheels face upward.
3. Take the first pair of front wheels and insert them into the leg of the stroller by pushing it down. You’ll hear a clicking sound that means it’s locked perfectly into place.
4. Take the second pair and repeat the same thing. Hold on to each wheel and make sure the wheels are safely attached.
5. Turn your stroller to one side and try putting it on the rear wheels.
6. Take the rear axle and put it on the clips located on the back of the stroller. Push the axle into the clips.
7. Fit the child tray on each armrest.
8. You can attach the canopy by just clicking it on the sides of the stroller frame.
9. Your Trend Sit and Stand Double Strollers are ready for the ride.
10. If you want to fold it for putting it in the back of your car, then simply push the little switch located on the handlebar, squeeze the stroller, and secure the folding with the small strap.
Put it into your car’s trunk and enjoy your family trip with this amazing travel system stroller!
To give our readers a bonus, we would like to enlist some of the products trusted by the parents.
Baby Trend is quite experienced and has set high standards in terms of safety, especially for juvenile products such as nursery items, high chairs, boosters, strollers,
full-size strollers, jogging strollers, lightweight systems, modular travel systems, single strollers, car seat harness boosters, wagons, double strollers, 3-wheel standard travel systems, and much more.
Are you expecting a baby soon, or has your child just joined your family? You will need an infant car seat from his birth until he is mature enough to use a booster.
All Baby Trend car seats offer designs to meet the needs that parents value the most and also meet present-day safety standards. Resulting in ensuring your child is safe and protected.
Baby Trend Car Seat Installation Guide.
Now that you have bought a car seat and you are looking at the baby trend car seat manual, wondering how to assemble it?
Well, we are here to give you baby trend car seat instructions. Keep reading!
Weight and Height Limitations
First of all, you need to follow the age limit and weight restrictions for the sake of your child’s safety.
• Keep in mind your baby’s weight should be somewhere between 5 lbs and 32 lbs.
• His height should be 32 inches or less.
Baby trend car seat base installation
While installing a baby trend car seat base, you have two options: either you have to attach it with your vehicle belt or the Latch system.
The latch system is recommended for high safety and protection against car accidents.
Follow the below-mentioned steps to install a baby trend car seat base into your vehicle;
1. First thing first, park your vehicle on a level surface so that the Seat Angle Indicator located on the left side of the Car Seat will properly indicate the proper angle of recline for the seat.
2. Remove the protective belt adapter.
3. Find a suitable seating position to put your baby’s car seat.
4. Now locate the latch anchors of your vehicle seat.
5. Click in the latch connectors of the car seat base to the vehicle latch lower anchorages by pushing the Base toward the rear of the vehicle.
There will be a “click” sound, ensuring a successful connection. Once again check that both connectors are securely attached to the lower anchorages by pulling on the Base.
6. Pull the belts of the car seat base to ensure a tighter connection between the car seat base and your vehicle’s seat.
7. If your infant car seat base is secured properly, then it’s time to fix your baby’s car seat into the base.
8. Click on the car seat in the rear-facing position. You will notice a clicking sound, which means the seat is locked into the base.
9. Now adjust the handle of the car seat by moving it to the backside of the car seat. That’s all!
Adjusting Harness System.
When you are done with the assembly of the car seat stroller for your infant your next mission is to adjust the harness system according to your baby size.
Follow these steps;
1. Loosen harness straps by pressing the Harness Adjustment Button.
2. Pull the harness straps toward yourself.
3. Open the Harness clip by pressing a button and sliding it in the opposite direction, away from you.
4. Unlock the harness buckle by pressing a button and sliding the buckle tongues up and out of the buckle.
5. Place your child in the car seat so that the child’s bottom is against the back of the seat.
6. Check that the harness straps are located on or just above the baby’s shoulders.
7. Now, put the two buckle tongues together; the left buckle tongue should be onto the right buckle tongue; putting them together, insert the two joined buckle tongues into the harness buckle present in the middle.
8. Double-check the tongues to make sure that both right and left tongues click into their right place.
How to Remove the Base from your car?
Here is how you can disconnect your base from your vehicle.
1. Disconnect the latch lower connectors and push the base toward the latch connectors.
2. When you push on the base, press the latch release button on one of the latch connectors. Now, pull the base away from the vehicle anchors.
3. Repeat the same procedure on the opposite side.
4. Put the belt adapter onto latch connectors when not in use to ensure safety.